Event Staffing Management Platform: How to Choose
September 25, 2026

Most teams should choose an event staffing platform by testing scalable event scheduling workflows first - not by comparing feature lists.
If I were picking one, I’d start with four checks:
The article’s main point is simple: a platform is only a fit if it works when schedules change fast. That means I’d look at staff count, simultaneous events, mobile use, waitlists, support hours, training time, and plan caps before I make a call.
A few numbers stand out:
Here’s the short version:
| What I’d check | What good looks like |
|---|---|
| Capacity | Covers peak roster, event count, roles, and locations |
| Scheduling | Fast event setup with role-based assignment |
| Changes | No-show and decline handling without manual cleanup |
| Mobile | Staff can view details and respond from iPhone or Android |
| Support | Help is available on nights or weekends if needed |
| Pricing | Plan fits peak use, not just average use |
So before I trust any demo, I’d run one normal event and one busy event through the platform, time every step, and score only what I can verify myself.
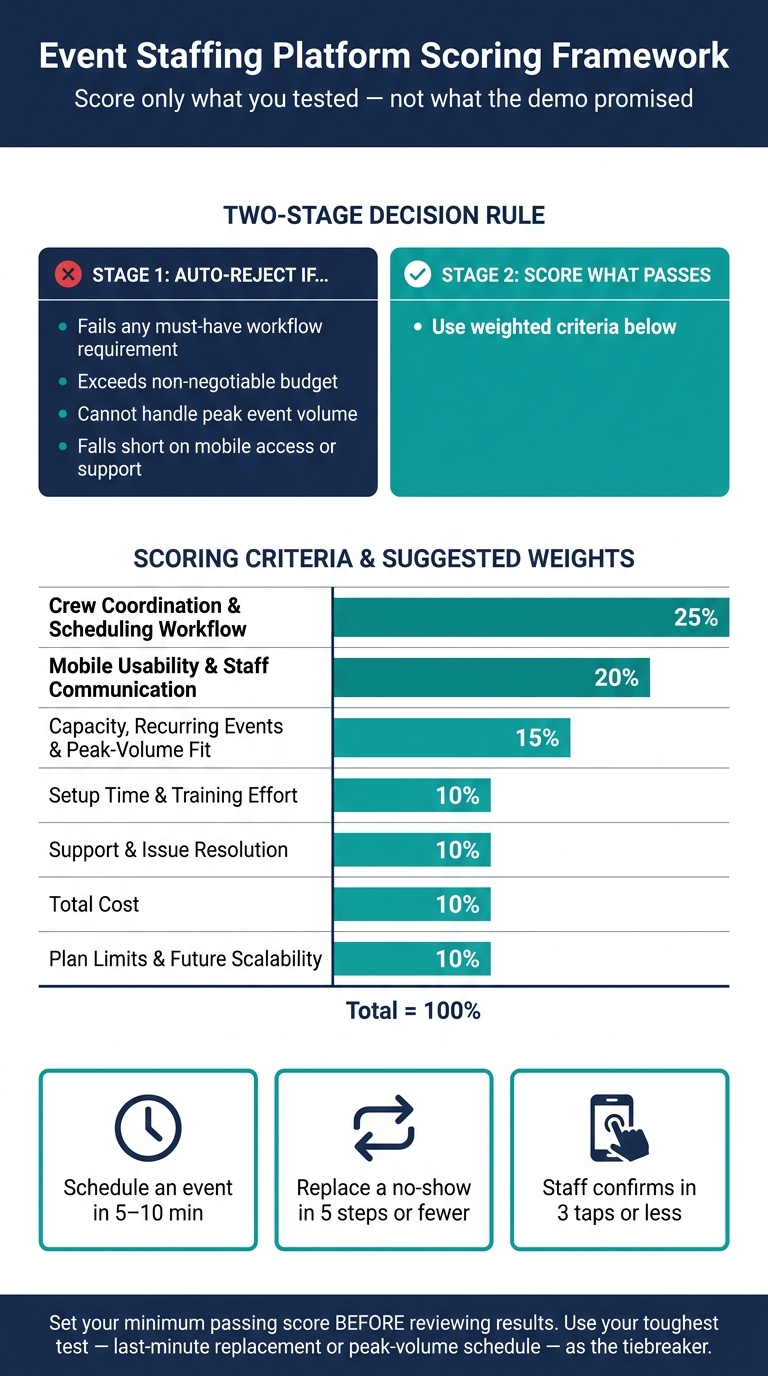
Event Staffing Platform Evaluation Scorecard: Key Criteria & Weights
Use your busiest weekend, not your average week, to set capacity needs. That’s the number that matters when schedules get tight and mistakes start creeping in. More volume means more chances for missed assignments, staff conflicts, and missed updates. So the platform needs to hold up during peak demand, not just on a quiet Tuesday.
Use the table below to turn staffing volume into platform requirements:
| Usage area | Current usage | Peak usage | Projected 12-month usage | Required platform capacity |
|---|---|---|---|---|
| Active roster | 25 workers | 45 workers | 60 workers | 60+ active workers, plus seasonal and backup staff |
| Staff per event | 18 | 75 | 90 | 90+ assignments per event, including setup and teardown shifts |
| Simultaneous events | 2 | 6 | 8 | 8+ concurrent events with separate schedules and details |
| Locations | 3 | 10 | 14 | 14+ locations or flexible location entry without extra charges |
| Roles | 8 | 16 | 20 | 20+ role types with role-specific assignments and qualifications |
| Admin users | 2 | 5 | 7 | 7+ named users or a clearly priced administrator tier |
Treat the required platform capacity column as your buying standard. It should cover your peak load, plus some room for growth over the next 12 months.
Break your staff into four groups: core, seasonal, on-call, and specialist. This matters more than it may seem at first glance. If you have 25 regular staff and 20 seasonal staff, your platform doesn’t need room for 25 people. It needs room for 45 active workers.
You also need to check capacity for simultaneous events on its own. Three events can easily demand 70 workers at the same time during setup and guest arrival. If that happens, the platform should make conflicts easy to spot instead of burying them.
According to LASSO's 2025 State of the Events Industry report, 63.5% of event organizations were adding new crew regularly. That’s a good reminder to plan for roster movement, not a fixed headcount.
Once you’ve pinned down your capacity, you can line it up with the scheduling tools you’ll test next.
At higher volume, a few tools go from helpful to required. Look for:
These aren’t nice extras. They’re selection filters tied straight to the workflow you’ll test in the next section.
Quickstaff includes event duplication along with centralized event details, so addresses, call times, dress codes, and shift notes stay attached to each job instead of getting scattered across texts and emails. As Jennifer Manley, a Staffing Coordinator, put it:
"My time spent scheduling has shrunk majorly, leaving me more time to focus on recruiting, on-boarding and training." - Jennifer Manley, Staffing Coordinator
Use these requirements to test workflow speed in the next step.
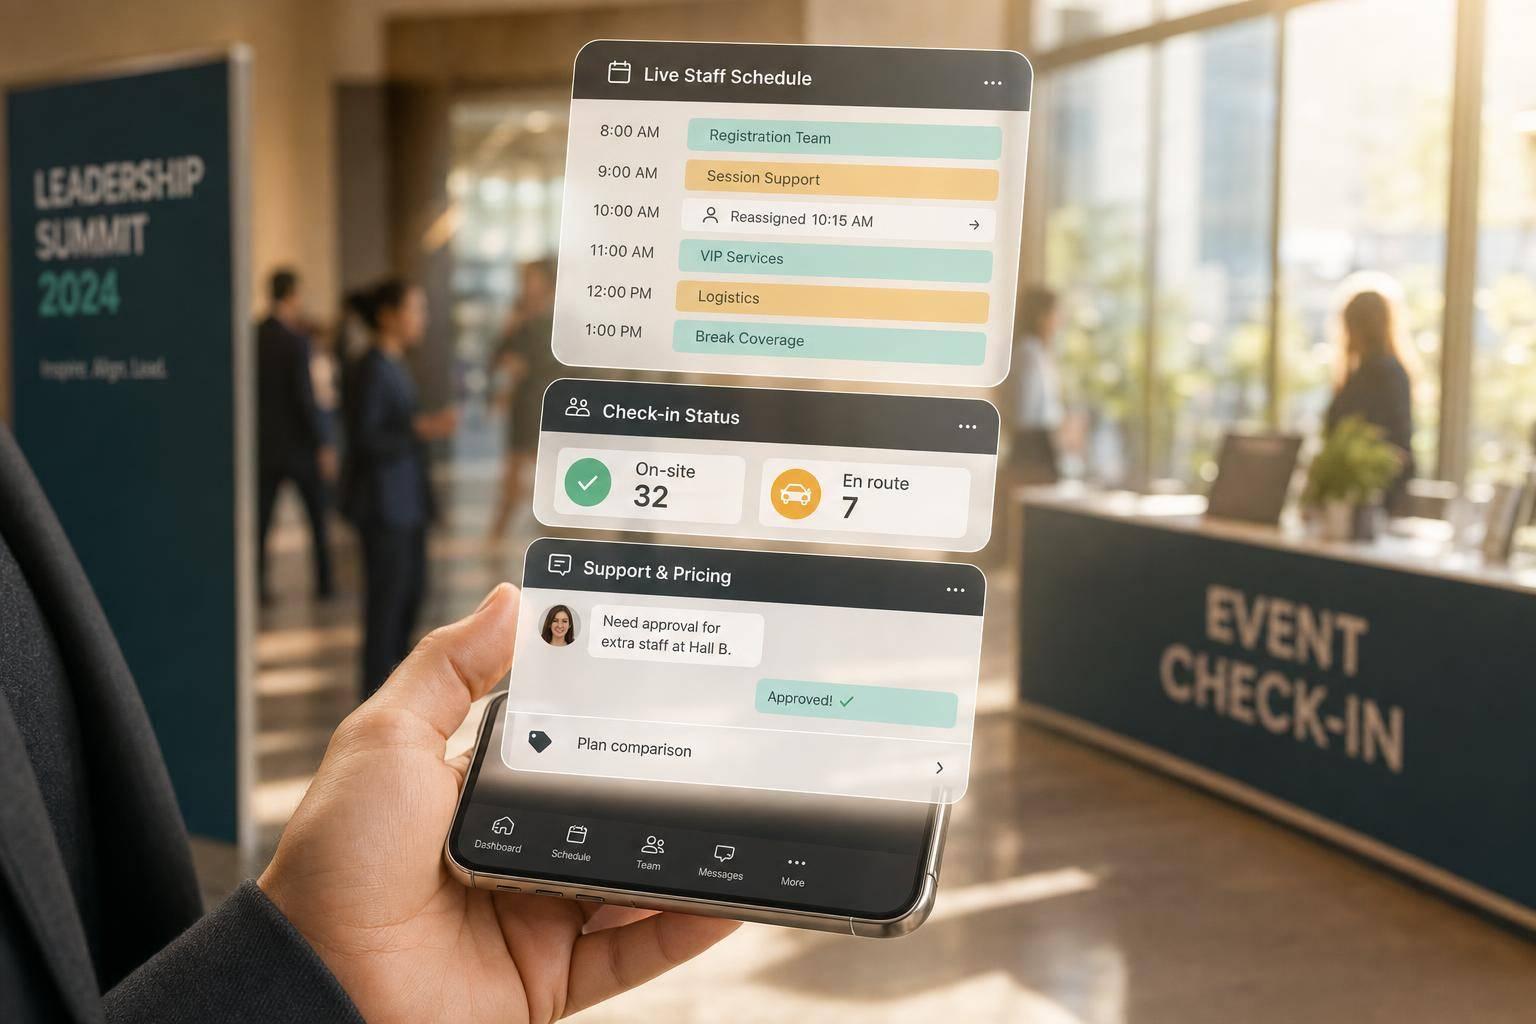
Start with one real event and run the whole thing through the platform to see how event staff scheduling works in practice. A feature list can look nice on paper, but that doesn’t tell you how the system behaves when a shift gets declined 20 minutes after publishing. The only way to know is to test the full workflow on a busy-day event from your own calendar: create it, assign staff, publish it, handle a decline, pull from the waitlist, and send reminders.
Before you begin, set a time limit. Once employee profiles and templates are in place, a coordinator should be able to create an event, add shifts, assign by role, and publish the schedule in 5 to 10 minutes. Count every click and every extra step. If you have to type the venue address twice or send a separate message to staff, that’s a problem worth logging.
After the schedule goes live, simulate a decline. Open the spot, move it to the waitlist, invite eligible workers, confirm one acceptance, and make sure the original worker is no longer on the active roster. A replacement flow should take five steps or fewer and leave a clear audit trail.
| Task | Required Action | Platform Response | Proof to Confirm |
|---|---|---|---|
| Create event | Enter date, time, location, and role notes | Event appears on the master calendar | Visible on both coordinator and staff views |
| Assign by role | Filter staff by role and availability | System flags conflicts or unavailable workers | No double-booking after assignment |
| Publish schedule | Send invitations to assigned staff | Automated notifications dispatched | Staff receives the invite on mobile |
| Handle a decline | Staff declines; coordinator opens the position | System routes the opening to a waitlist or available pool | Event status updates to reflect the gap |
| Replace a no-show | Mark worker absent; invite qualified replacements | Replacement receives full event details | Original worker removed from the active roster |
Have someone on your team test the staff side on their own iPhone or Android phone, not on desktop. They should be able to sign in, view the assignment, see the venue address, call time, dress code, pay, contact, and instructions, and confirm availability without needing a laptop. If that takes more than three taps, the mobile flow is dragging.
Then test for conflicting event details. Enter the event once, then change the arrival time from 3:00 PM to 2:30 PM. Check the coordinator dashboard, the staff view, and any message the system sends. The update should match everywhere. You want one source of truth, not a messy patchwork of old texts, saved emails, and stale spreadsheets.
Run at least five last-minute changes during your test:
Track how long each update takes to publish and how fast staff receive it. Push alerts should land within minutes and show read status.
You should also test duplicate assignment handling. If two workers grab the same open bartender slot at the same time, the system needs to sort that out cleanly: one gets confirmed, the other goes back to the waitlist. The coordinator shouldn’t have to clean up the mess by hand. If a platform only sends a group text or relies on a shared spreadsheet, that gray area stays unresolved - and that’s a bad place to be two hours before guests arrive.
If the workflow holds up, move on to setup time, training, support, and plan limits.
If the workflow looked good in testing, the next step is simple: how long will it take to get the platform live for your full team with your actual staff list, roles, and event templates?
That’s the test that matters. A tool can feel smooth in a demo, then slow down once the whole team starts using it. You want to know whether the same workflow stays fast and steady at full scale.
Not every user needs the same setup or training.
Administrators usually do the heavy lifting. That includes roster import, duplicate cleanup, role setup, availability rules, templates, notifications, and user invites. If your roster is small, setup will usually move faster. If it’s large, expect more cleanup, more role mapping, and more training time.
Event managers need hands-on training for day-to-day work, like:
Temporary staff should need very little training. In most cases, they should only need to log in, review event details, accept or decline shifts, update availability, and respond to messages.
Ask the vendor for role-based training materials. Also confirm that permissions can stop temporary staff from changing events or seeing info they don’t need.
One of the best ways to check all of this is to run a real pilot event. Build it with multiple roles, different shift times, location details, availability rules, reminders, and one schedule change. Then watch what happens. Measure how long new users take to finish core tasks without help. Also check whether staff can log in and see the right event details without admin support.
This part matters more than many teams think.
Busy event periods often hit at night or over the weekend. So before you sign, confirm whether live support is available during active events, how fast the team responds, and whether help comes through phone, chat, or email.
Don’t just take the sales answer at face value. Test support during the trial with a realistic urgent issue. Then record two things: response time and solution quality.
“Unlimited events” can sound great, but it doesn’t always mean unlimited use.
Check the fine print for staff limits, manager accounts, locations, and message volume before you buy.
Quickstaff’s published plans are tiered by staff capacity and include assisted onboarding and customer support.
| Plan | Monthly Price | Max Staff | Events and manager accounts | Onboarding and support |
|---|---|---|---|---|
| Boutique | $49/month | Up to 35 | Unlimited | Assisted onboarding & customer support |
| Growing | $99/month | Up to 70 | Unlimited | Assisted onboarding & customer support |
| Large | $249/month | Up to 175 | Unlimited | Assisted onboarding & customer support |
Teams with more than 175 staff need a custom quote.
When you price a plan, use your peak roster size, not your average. That gives you a much safer cost estimate. And get the vendor’s policy in writing for what happens if you hit the staff cap. Do they block new users, move you to an upgrade, or charge an overage?
If setup, support, and pricing all check out, score the platform against your must-have workflow checklist.
Once pricing, support, and plan limits check out, put the platform through a scored test. The goal is simple: see whether it works with your actual workflow, not just a polished demo. Use the same process your team depends on during your busiest weeks.
Focus on must-have tasks only. That usually includes event creation, role-based assignment, mobile confirmation, same-day edits, and last-minute replacement. If a platform can't handle one of those tasks in a steady way, it fails. It doesn't matter how good the rest of the feature set looks.
Run two test scenarios:
If something breaks when volume goes up, mark it as a fail.
Time each task from start to finish. Then add one more check that often tells you a lot: ask a temporary staff member who didn't help build the event to log in, find their assignment, read the venue instructions, and confirm a change from their phone. If that feels clunky for them, your coordinators will deal with that pain later.
After the test, use a two-stage decision rule.
First, reject any platform that fails a must-have requirement, goes over a non-negotiable budget, can't handle peak event volume, or falls short on mobile access and support. A strong score in reporting or integrations should not cancel out a weak spot in mobile access or last-minute replacement.
Then compare the platforms that passed with a simple weighted scorecard.
Multiply each 1-to-5 score by its weight, then total the results. Here's a practical starting point you can adjust to fit your operation:
| Criterion | Suggested Weight |
|---|---|
| Crew coordination and scheduling workflow | 25% |
| Mobile usability and staff communication | 20% |
| Capacity, recurring events, and peak-volume fit | 15% |
| Setup time and training effort | 10% |
| Support and issue resolution | 10% |
| Total cost | 10% |
| Plan limits and future scalability | 10% |
Set a minimum passing score before you look at the results. For example, you might require 4 out of 5 overall, with a higher bar for coordination and mobile usability. If two platforms land close together, use your toughest test as the tiebreaker - last-minute replacement, group alerts, or a peak-volume schedule.
If you use Quickstaff, confirm that event creation, scheduling, availability tracking, waitlists, reminders, and mobile access line up with your busiest workflow.
Score only what you saw during testing, not what the demo said would happen. Write down timed results, errors, staff feedback, and vendor confirmation. Gut feel alone won't carry you when you're picking a platform your team will lean on during the busiest days.
The right event staffing management platform is the one that still holds up when events overlap, navigate common scheduling challenges, a worker cancels two hours before call time, and your coordinator has to sort it out from a phone.
Use that as your yardstick. The selection process is pretty simple: check peak volume, test actual scheduling and communication, verify setup, support, and plan limits, then score each platform against what happens on your busiest days.
If you're looking at Quickstaff, use the 14-day free trial for a live test. Create an event, assign roles, send invitations, simulate a same-day cancellation, and confirm the update reaches staff on their phones.
That’s the test that matters most. Pick the platform that keeps your crew coordinated when schedules shift under pressure - not the one that only looks good during a calm-week feature check.
Start with standard staffing ratios. A common baseline is 1 server for every 20 guests for plated service and 1 server for every 30 guests for buffet service.
From there, use a staffing needs analyzer to line up headcount with each event’s size and service demands. That helps you avoid guessing, especially when one event is a simple buffet and another needs tighter table service.
It also helps to look back at past event data to spot labor patterns. You may find that certain event sizes, formats, or dates call for more hands on deck than expected.
Before you lock in coverage for high-volume dates, use centralized software to track staff availability and role-based skills. That way, you’re not just filling shifts. You’re matching the right people to the right jobs.
During a free trial, don’t try to test everything. Put your attention on the features that fix your team’s biggest day-to-day gaps.
Start with the basics that matter most: real-time availability tracking, shift assignment, mobile messaging, mobile performance, and handling last-minute changes. Those are the tools your team will lean on when things get busy.
If you can, run the platform alongside your current system for a week. Then test the core tasks your team does all the time, such as:
That kind of side-by-side test gives you a much clearer sense of how the tool works under normal pressure. It also helps you spot friction early, before your team is asked to switch over.
Test the platform with a small core group for one week alongside your current system.
During that trial, staff should be able to handle the basics from their phones without jumping through hoops. That means they can:
If you still need to export data, re-enter information, or send updates by hand, the platform is adding work instead of cutting it.