Event Scheduling and Invoice Workflow
September 21, 2026

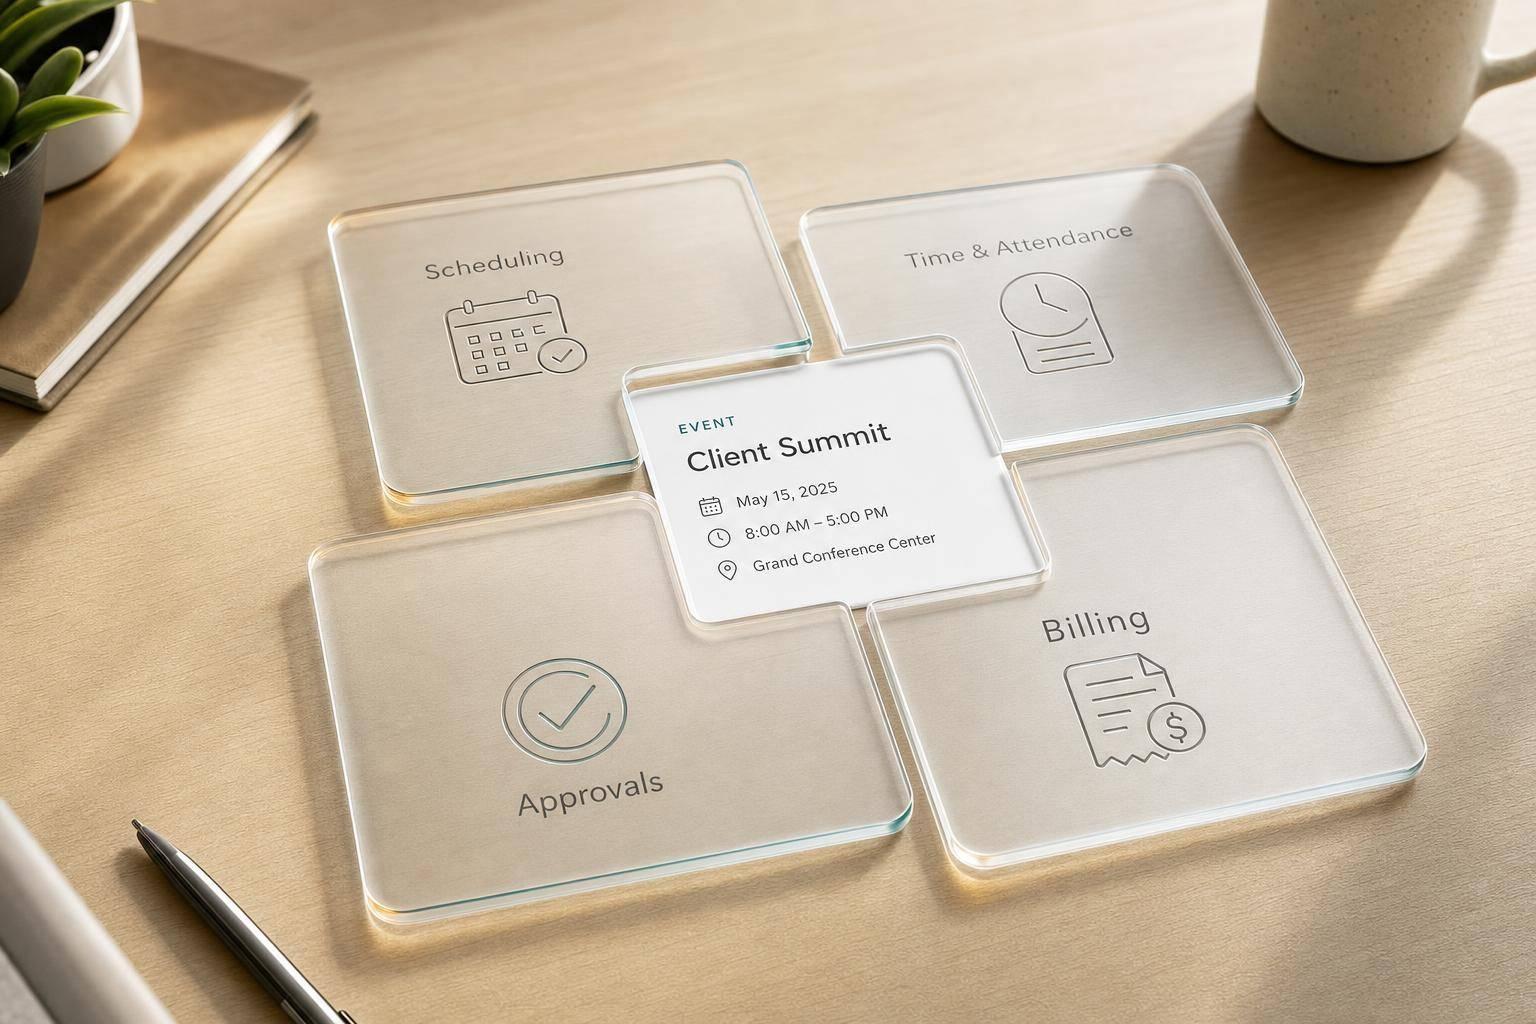
If your event schedule and invoice do not match, you invite payment delays. I see the fix as simple: use one flow from event setup to final invoice, and make each step feed the next with the same event data.
Here’s the article in plain terms:
A few numbers stand out:
The core point: I keep scheduling, shift records, approval, and billing tied to the same source record so invoice totals match the work that was done.
| Step | What I focus on | Why it affects the invoice |
|---|---|---|
| Event setup | Client, venue, date, service details | Sets the base record for billing |
| Staffing plan | Roles, counts, shift times, rate rules | Shapes hours, rates, and line items |
| Staff booking | Confirmed workers and backups | Cuts gaps, no-shows, and last-minute changes |
| Shift tracking | Actual hours, breaks, role changes | Keeps billed time accurate |
| Approval | Manager checks and locks hours | Stops billing from using bad data |
| Invoice draft | Triggers, line items, totals | Turns approved work into charges |
| Final send | Taxes, credits, terms, payment info | Cuts disputes and payment delays |
If I had to sum it up in one line, it would be this: one shared event record leads to cleaner invoices and fewer billing problems.
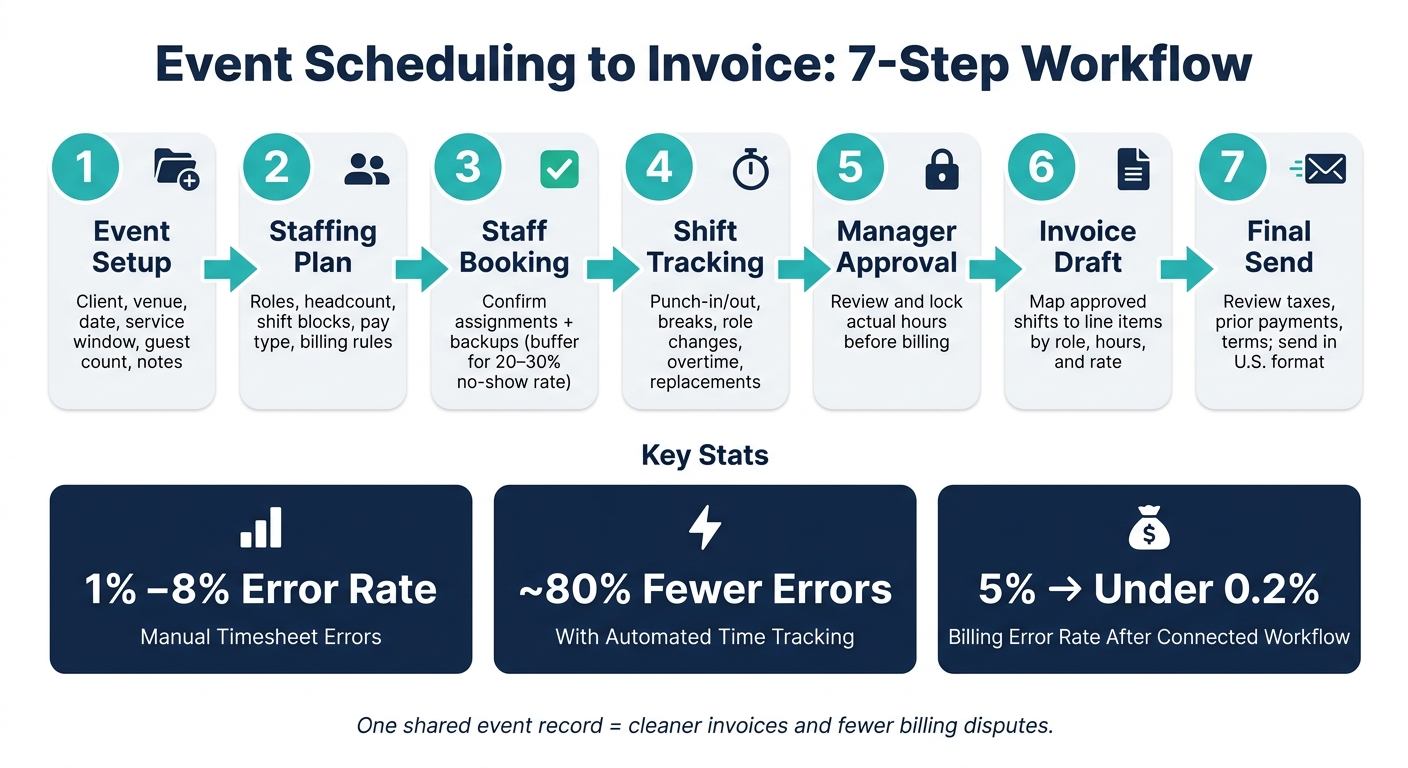
Event Scheduling to Invoice: 7-Step Workflow
Set up the event record with care. Every invoice line that comes later should tie back to this one record.
Put all event details into a single record: client name, venue name and address, event date in MM/DD/YYYY format, such as 10/15/2026, service window, load-in time, breakdown time, expected guest count, and any notes like VIP areas, access limits, or menu style.
Keep scheduled time and billed time in sync. If the schedule says one thing and the invoice says another, clients will notice. That gap can lead to avoidable questions and back-and-forth.
Quickstaff keeps these details in one place, so managers and staff work from the same record and event data stays consistent through billing.
Once the event details are set, break the staffing plan into clear roles: servers, bartenders, captains, kitchen/back-of-house staff, setup crew, and cleanup crew. Then assign headcount for each role based on guest count, service style, and venue logistics.
Next, map each role to a clear shift block.
| Shift Block | Example Window |
|---|---|
| Setup | 2:00 p.m. – 4:00 p.m. |
| Service | 4:30 p.m. – 9:30 p.m. |
| Breakdown | 9:30 p.m. – 11:00 p.m. |
For plated dinners, plan for about 1 server per 10–12 guests, 1 bartender per 50–75 guests, and a 10–15% buffer for no-shows.
Each role should also show how pay and billing work. Is the shift hourly, flat-rate, overtime-eligible, or tied to a minimum-hours rule? That detail matters because it will shape the invoice math later. Adding it at the start cuts down on manual fixes after the event.
With roles and shift times mapped out, it’s time to fill them with confirmed staff. Start with availability so you don’t spend time reaching out to people who already have conflicts. Then send invites to qualified staff for each role.
It also helps to invite a few more people than you need. Once the headcount is full, later confirmations can move to a waitlist. Since temp and event staffing no-show rates can run between 20–30% in the industry, having backups ready can protect service quality and billing accuracy.
Each booking confirmation should include:
Clear assignments cut down on day-of confusion and help protect the schedule you’ll rely on when it’s time to approve actual hours worked.
Use a mobile-friendly system so staff can confirm shifts fast and managers can fill open roles in real time. Once staff are confirmed, the workflow moves to actual hours and day-of changes. Next, track actual hours, no-shows, and overtime so approved shifts can turn into invoice drafts.
Once staff are confirmed, the next job is simple: record what actually happened on site. Only approved actual hours should be billed.
This is where invoice mistakes usually slip in. A shift might look fine on the schedule, but the billed amount changes fast when someone arrives late, stays longer, switches roles, or takes a different break than planned. If those changes don't make it into the shift record before billing begins, problems pile up.
Track the planned shift, actual punch-in and punch-out times, breaks, final role, and any changes from the original plan.
For example, a server scheduled from 4:00 p.m. to 10:00 p.m. who clocks in at 4:15 p.m., clocks out at 10:30 p.m., and takes a 30-minute unpaid break should bill 6.25 hours.
Manual timesheets carry a 1%–8% error rate. Automated tracking cuts processing errors by about 80% and processing time by 30%.
Quickstaff keeps attendance logs tied to each event record, so actual hours stay separate from the planned schedule and flow into billing without manual re-entry.
Event-day changes happen. That's normal. What matters is logging each one in the shift record before billing starts, not after a client spots a charge and asks for an explanation.
| Exception | How to Document It |
|---|---|
| No-show | Mark $0 billable hours and add any contract cancellation fee |
| Late arrival | Adjust actual start time; recalculate billable hours from the corrected time |
| Same-day replacement | Link the replacement worker to the original role; keep role, rate, and shift time intact |
| Extended cleanup or extra bar service | Add as an overtime segment with its own start/end time and applicable rate |
| Role change (for example, server to bar captain) | Split the shift into two segments with the correct rate for each role |
A clean shift record matters here. If one person covers cleanup for an extra hour or moves from server to bar captain mid-event, that change needs its own time and rate. Otherwise, the invoice can end up wrong even if the staff worked the right hours.
Once the event ends, a supervisor should review the full shift record before anything moves to billing. This last check helps prevent billing mistakes and client disputes.
The review should confirm:
After the manager signs off, lock the shift record so only authorized changes can be made.
Quickstaff supports this by keeping all staffing changes - replacements, role updates, and schedule adjustments - in one centralized event record. That gives the manager one full view of the event instead of forcing them to piece things together from texts, spreadsheets, or paper sheets. Approved hours and roles then feed invoice line items and rates. Next, map those approved shifts to invoice drafts.
Once a manager approves the shifts, the process moves from locked shift data to an invoice draft, then to final review and send. This transition is a key feature to look for when choosing shift assignment software.
A billing trigger tells the system when to draft an invoice. The most common options are:
In Quickstaff, event status changes - from Booked to Confirmed to Completed - can map straight to these triggers. That means invoice drafts can be created automatically when the right status hits. Once the trigger fires, approved shifts flow into the draft as billable line items.
With the trigger in place, each approved shift becomes a billable line. A simple setup is to group approved shifts by role, approved hours, rate, and total.
For hourly roles, group by position. For example, three servers working 6 hours each can appear as one line: Event Servers – 18.00 hours @ $20.00/hour = $360.00. Overtime should sit on its own line at the higher rate - for example, Overtime (4 hrs) @ $30.00/hour = $120.00. That way, the client can see where the total came from without digging through notes.
Flat-rate roles are even simpler. You skip the hour math and bill the event rate directly: Event Captain – 1 event @ $250.00 = $250.00. If a staff member reached a 4-hour contractual minimum but only worked 3.25 hours, bill 4.00 hours and note the minimum in the line description. That small note can save a lot of back-and-forth later.
Add delivery, linen, equipment, and other event-linked fees as separate lines. Last-minute changes - like an extra bartender or extended teardown - should also appear on their own lines with their own amounts. Putting everything on one invoice makes it easier for clients to check the total and cuts down on follow-up questions.
| Billing Method | Cash-Flow Impact | Administrative Effort | Client Clarity |
|---|---|---|---|
| Deposit-Based | Strong early cash flow; funds collected at booking cover fixed costs and staff commitments | Moderate; one deposit invoice plus a final invoice | High when deposit percentage, due date, and refund policy are clearly stated |
| Milestone-Based | Balanced; payments spread across planning stages reduce reliance on one final payment | Higher; multiple invoices must be issued and tracked | Good when milestones align with visible steps like menu approval or final guest count |
| Completion-Based | Weakest early cash flow; most revenue arrives after the event | Lower; one invoice generated after shifts are approved | Very high; charges reflect actual hours worked and services delivered |
A deposit-plus-completion setup gives you early cash coverage while keeping the final invoice tied to approved shifts. After the draft is created, review totals, prior payments, taxes, and terms before sending.
Once shifts are approved, the last step is simple in theory but easy to mess up in practice: make sure the invoice is right.
Cross-check the draft invoice against the approved shift log, roster, and contract before you send it. Each approved shift, billed hour, and rate should match the approved record. Overtime, minimums, call-back pay, and rush fees should also line up with the contract terms.
Prior payments should appear as clearly labeled credits. For example, if a client paid a $500.00 deposit on a $3,200.00 event, the invoice should show the full event total, subtract the deposit as a labeled credit, and list a balance due of $2,700.00.
Taxes can get tricky fast. They may change by state, and in some cases by city or county too, so it’s not safe to make a blanket assumption. Check whether labor, equipment fees, or service charges are taxable based on the client’s location and the terms in your contract. Then spell out payment terms in plain language. For example: "Payment Terms: Net 14. Payment is due within 14 days of invoice date. Due date: 10/15/2026." That’s much clearer than “due upon receipt,” and it gives the client’s accounts payable team exactly what they need to move fast.
After the numbers check out, format the invoice so the client can review it without hunting for details.
Use MM/DD/YYYY for all dates. Show all amounts in USD with a dollar sign and two decimal places. Group line items by role or service so the bill is easy to scan. In the header, include the event name, event date, venue, and any client reference number, such as a PO number or job number.
Near the bottom, add a clear summary block with:
Also list accepted payment methods, such as ACH, card, or check, and include payment instructions or a payment portal link. It also helps to attach a short summary of final headcount, changes, and overtime.
After delivery, move straight into recordkeeping and payment tracking. Quickstaff helps by keeping event details, staff scheduling, availability tracking, reminders, and event updates in one place. When the final invoice comes from approved event data, you don’t have to piece the event history back together from scattered messages or spreadsheets.
After sending the invoice, save the invoice number, amount, terms, sent date, delivery method, and payment status in the event file.
Use one shared approved record across operations, billing, and accounting.
After a manager approves a shift, any invoice update should be handled as a documented correction only. In Quickstaff, record the reason for the change, the timestamp, and the approver tied to it. Also keep the approved record locked so the audit trail stays intact.
If hours or billing need to be changed, reopen the item or send a documented correction request. Once the update is made, have it reviewed and approved again before it goes to payroll or invoicing.
Check the difference against attendance logs, confirmation records, and event notes. Managers should update the time based on event logs or documented communication, then add a reason code so the audit trail stays clear.
If a staff member missed a punch, start a manual review to confirm the correct hours. After the hours are verified, lock the approved record to prevent unauthorized changes and help keep payroll accurate.
For most events, the best billing trigger is changing the event task status to Event Complete.
That kicks off post-event workflows right away, including payroll verification, expense reconciliation, and client wrap-up. It also gives the billing coordinator accurate hours and attendance data from finalized Quickstaff records, which helps cut retyping and reduce errors.