Crowd Safety Protocols for Event Teams
August 16, 2026

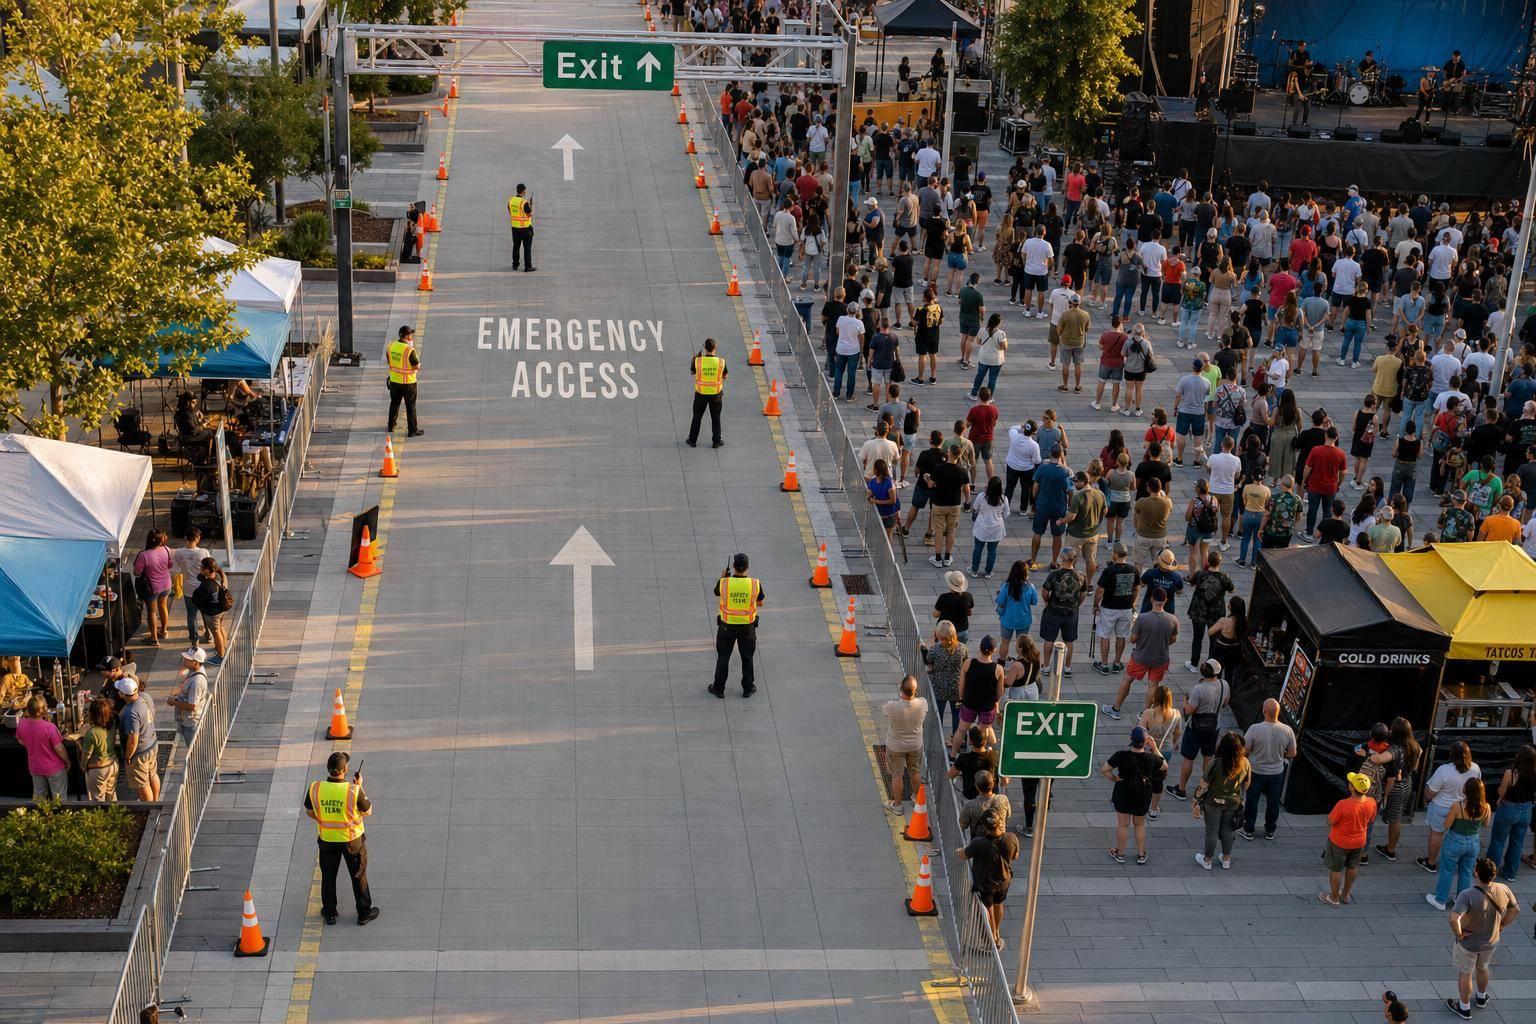
Most crowd problems start small, then turn into emergencies when no one acts fast. If I were running an event team, I’d keep my crowd protocol focused on five things: clear roles, fixed watch points, open routes, fast hazard reporting, and a written surge response plan.
Here’s the short version:
A few numbers matter:
This article is about turning those rules into a written plan your team can use on event day.
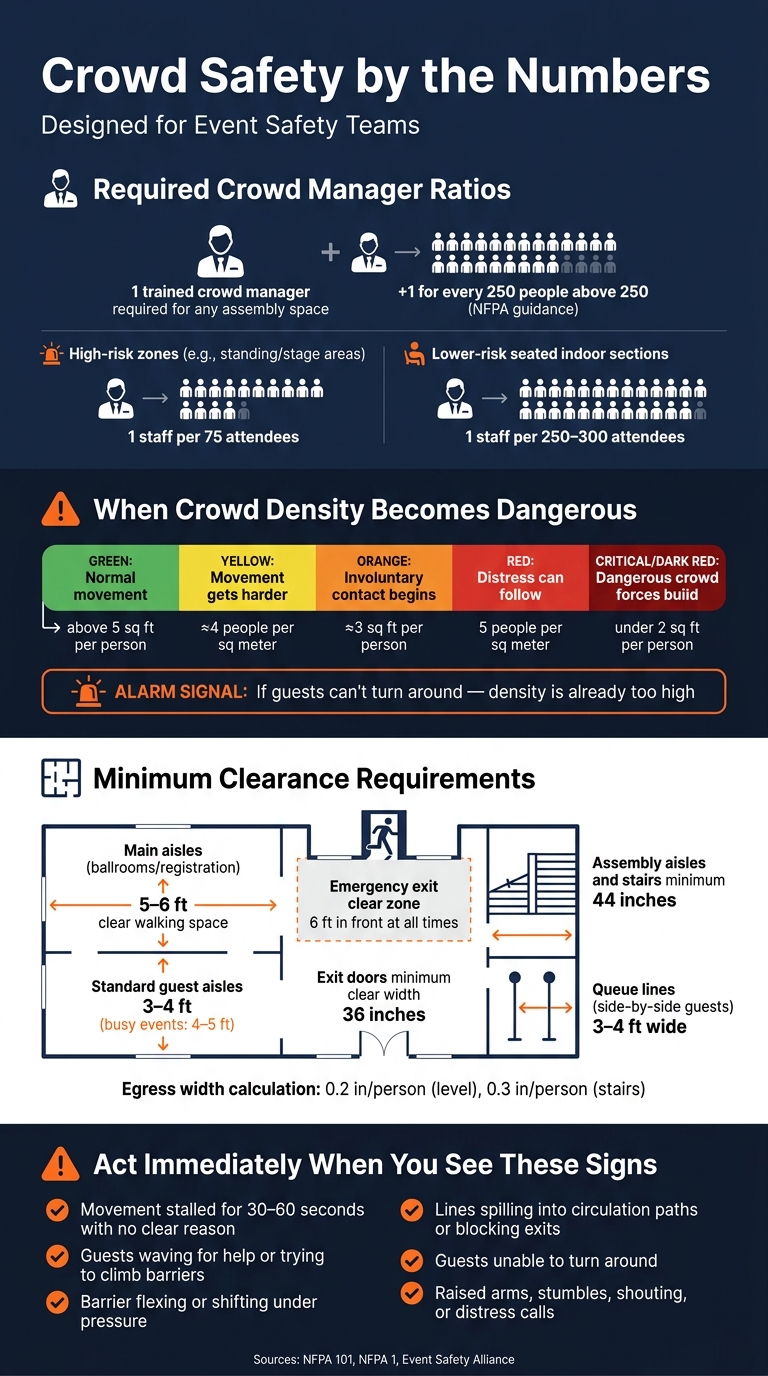
Crowd Safety by the Numbers: Key Thresholds Every Event Team Must Know
A written protocol is only half the job. The briefing is where that plan turns into plain, role-by-role instructions people can act on before the first guest walks in.
Use the protocol to give each team member a specific assignment ahead of time, so no one is guessing once the space starts to fill.
Set aside enough time to walk through the full safety plan. Cover expected attendance, peak times, the venue map, high-risk areas, radio channels, emergency contacts, and accessible routes.
Pick one decision-maker with stop-the-show authority. If staff spot a problem, they need to report it fast so that person can decide what happens next. Everyone should also know the difference between a temporary pause and a full evacuation, plus how the venue signals each one.
Before the briefing ends, do a quick confirmation round. Each person should repeat their watch point and who they report to. It’s simple, but it cuts down on confusion when things get busy.
Once roles are set, place staff where guest flow is most likely to bunch up or slow down.
Start by tracing the route guests take from entry to exit. Mark every spot where crowd density tends to build or movement naturally slows. Those pressure points should determine where staff stand and what they watch.
Top-priority areas usually include:
At each spot, staff should watch for clear warning signs. If movement stalls for 30–60 seconds with no clear reason, that’s a red flag. Visible distress matters too - guests waving for help, trying to climb barriers, or getting pushed off balance. At stage fronts, look for barrier flexing or shifting under pressure. At bars and concessions, watch for lines spilling into circulation paths or blocking emergency exits.
At about 4 people per square meter, movement gets harder; at 5, distress can follow.
Staffing levels should match the risk. In higher-risk zones, like standing areas near a stage, ratios as tight as 1 staff member per 75 attendees may make sense. In lower-risk seated indoor sections, 1 per 250–300 is a common baseline. Your risk assessment should decide the final count.
With those watch points covered, the next step is keeping routes open as the layout fills in.
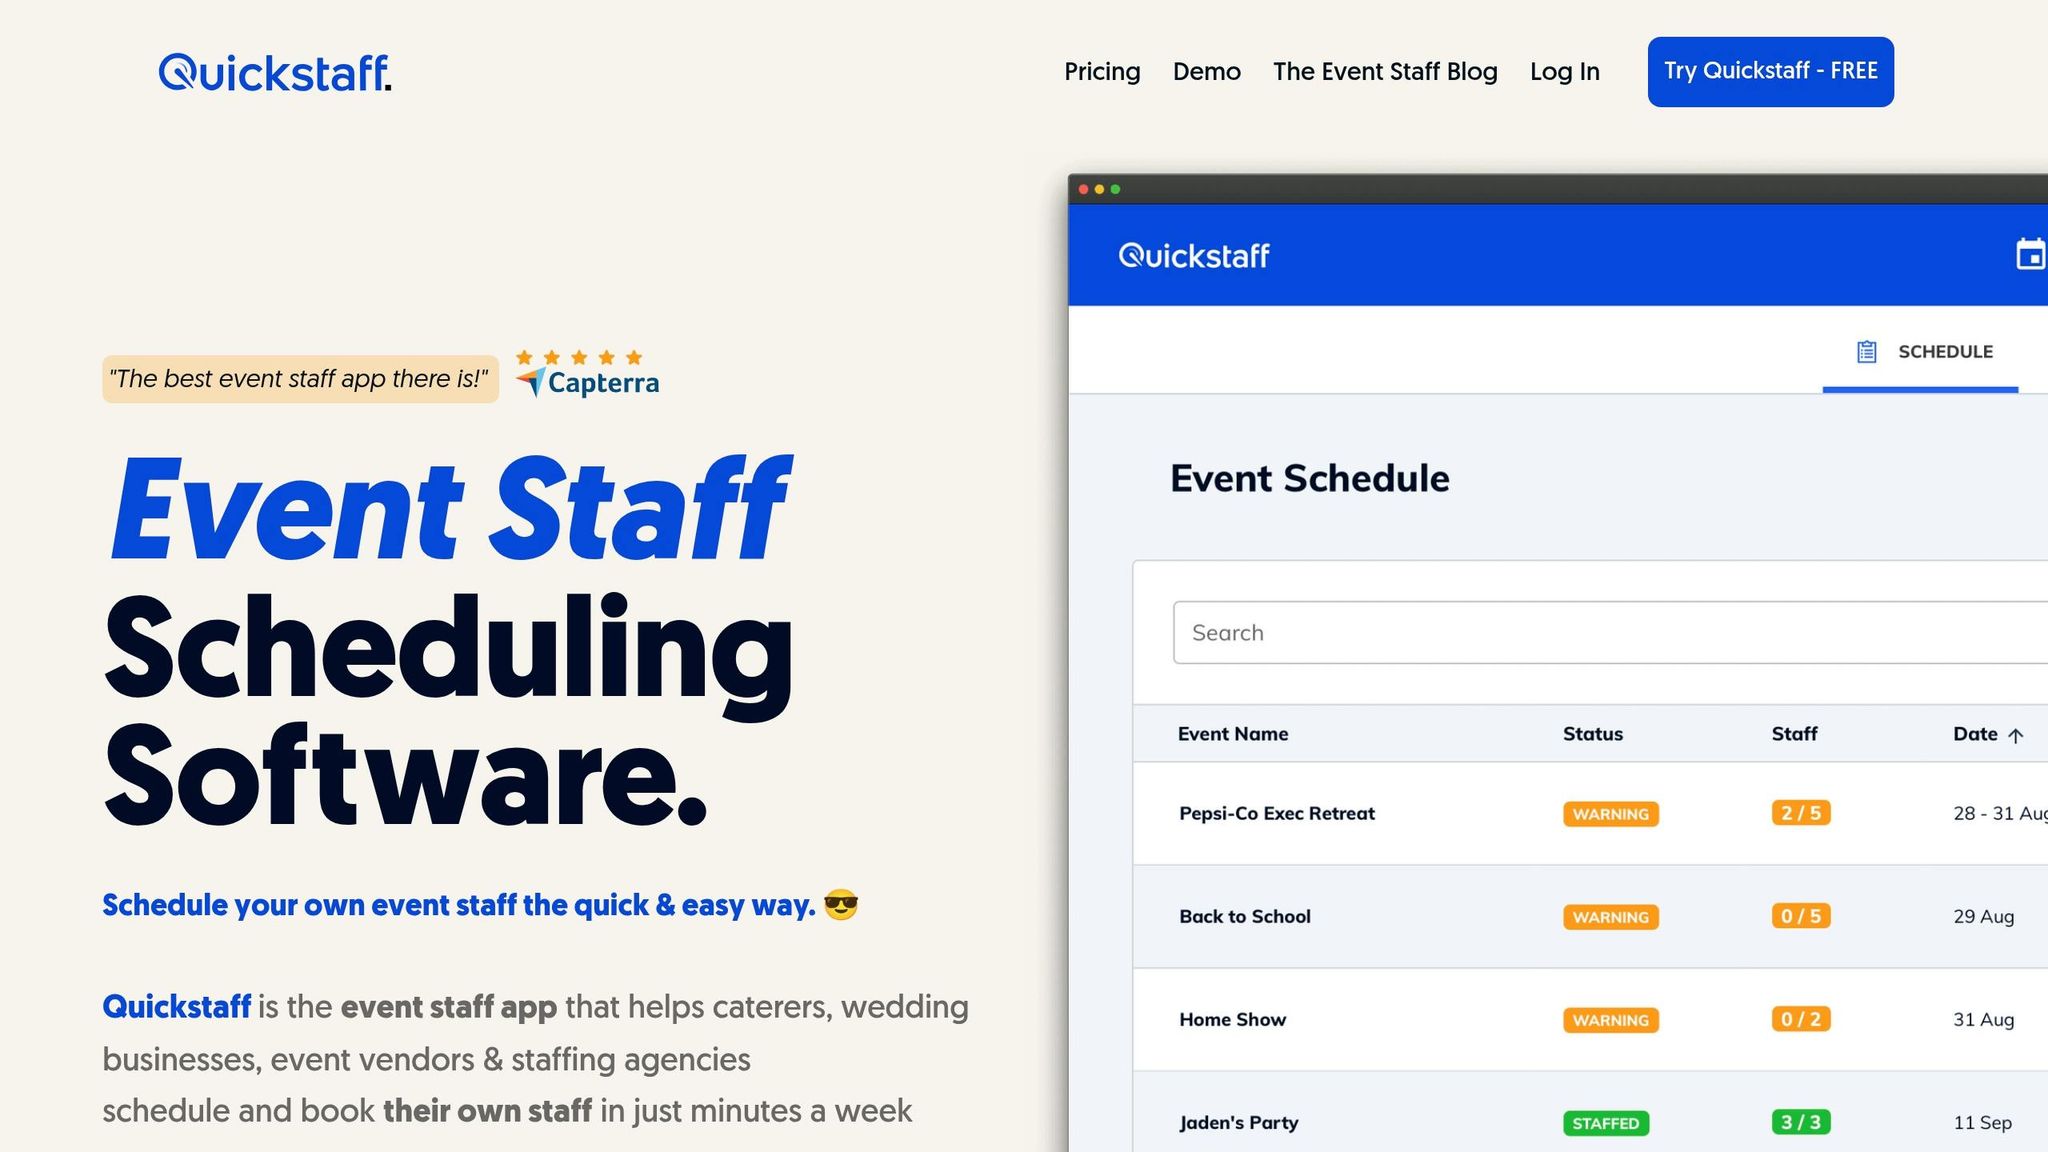
Quickstaff helps you assign location-based roles, attach shifts, track availability, and send mobile reminders. You can also store maps, radio channels, emergency codes, and supervisor contacts in each event record, so staff can check everything on mobile before they arrive.
That means a faster on-site briefing and clearer coverage across the venue.
Use your watch-point map to shape the floor plan. When people can move through a space without getting squeezed into the same spots, the whole event feels calmer from the start. Those watch points show you where traffic needs to stay open.
Start with a full circulation map before anything gets placed. Walk through the path guests will take from arrival to seating, then to the bar, restrooms, and exits. Pay close attention to places where paths cross or narrow. That’s usually where backups begin.
If the venue allows it, separate entry and exit doors. One two-way doorway can get crowded fast. Clear signs and a staff member at each door can keep traffic moving in the right direction.
For main aisles in busy spots like ballrooms and registration areas, leave at least 5–6 ft of clear walking space. Standard guest aisles can be 3–4 ft, but busy events tend to work better with 4–5 ft. Measure the actual walking width, not the gap between pieces of furniture, and leave room for queue spillover too.
Emergency exits need about 6 ft of open space in front of them at all times. No tables. No décor. No waiting lines. Under NFPA 101, required egress width is calculated at 0.2 inches per person for level components such as doors and corridors, and 0.3 inches per person for stairs, with common minimum clear widths of 36 in for exit doors and corridors and 44 in for many assembly aisles and stairs. Do that math before setup, not when the room is already full.
Service corridors need the same level of care. Catering carts and AV crews cutting through guest areas create crossing traffic that slows everything down. Mark those routes clearly, keep them separate when you can, and time heavier service movement - such as pre-service runs and tear-down - during periods when guest access to those areas can be limited for a bit.
Once routes are mapped, deal with the trouble spots using barriers and signs.
These tools work best when they support the direction guests already want to go. In high-traffic areas like bars, registration tables, and photo activations, use stanchions or light barricades to build queue lines that hold waiting guests without spilling into nearby aisles. Queue widths should fit two guests side by side - about 3–4 ft - so couples and small groups can wait together without clogging the lane.
Directional signs should be short, bold, and placed at eye level. Phrases like exit, restrooms this way, or registration ahead work better than long instructions. At bars and food stations, put some distance between the order point and the pickup point. Even a few feet can cut down on side bumps and stalled traffic when people are moving in opposite directions at the same counter.
Use the controls below to fix the blockages that show up most often.
| Circulation problem | Likely risk | Practical controls |
|---|---|---|
| Single narrow exit | Delays, crowd compression, blocked egress | Reroute guests earlier, post staff at the approach, remove obstructions, use temporary holds on nearby inflow |
| Congested staircase | Slow movement, trips, backflow | Assign a watch point, separate up/down traffic if possible, pace entry, redirect to alternate path |
| Crossing bar traffic | Side collisions, stalled movement, localized crowding | Move queue lines, add barriers, post directional signs, assign staff to keep service and guest paths separate |
| Registration table backing into doorway | Entry bottleneck | Relocate check-in, stagger arrival times, open another check-in point |
| Photo area blocking aisle | Choke point in circulation | Move the activation, mark a waiting zone, keep the aisle clear with staff oversight |
Check these routes during setup and fix issues before guests walk in. Using budget-friendly staff scheduling tools can help ensure you have enough team members at every watch point without overspending.
Once routes are open, the next job is watching them in real time. A clean layout on paper can still become risky when the space fills up. Crowd conditions can shift in seconds, so staff need to track movement closely and act right away.
Pay close attention to live warning signs in your highest-risk zones: raised arms, repeated stumbles, shouting, distress calls, and movement that slows into shuffling. Event safety guidance marks below 2 sq ft per person as the point where dangerous crowd forces can start to build, and around 3 sq ft per person as the point where involuntary contact begins. One plain, practical signal matters a lot here: if guests can’t turn around, density is already too high.
Stick to the reporting chain set in the briefing. This process is easier when you use event staff scheduling software to organize teams and communicate roles clearly. When staff spot a hazard or near miss, they first secure the area. Then they radio their supervisor with three things:
Supervisors review the report, judge the severity, and decide if it needs to go to medical, security, or stop-show authority. Near misses should be logged the same way, even when no one is hurt. That means recording the time, location, crowd condition, trigger, and action taken for every report. Over time, that gives you a clear record of where trouble starts and what keeps showing up.
Use the same sequence every time: detect, assess, stabilize, relieve pressure, escalate. Pause entry to the affected zone, stop non-essential activity nearby, and send staff to guide guests out of the pressure point. Use calm, direct PA announcements, and repeat the instruction until conditions improve. If your set thresholds are hit, such as guests pinned against barriers or repeated medical calls in the same area, command should activate stop-show authority or a partial evacuation based on the written protocol.
The same response pattern should apply across the surge points you’re most likely to face.
| Surge scenario | Immediate response actions |
|---|---|
| Front-of-stage compression | Halt inflow, alert command, use PA announcements to step guests back, deploy floor staff to relieve pressure, prepare medical support |
| Exit rush after a weather alert | Open all exits, redirect away from blocked routes, stop opposing traffic, make PA announcements, coordinate with venue leadership |
| Bar line spilling into main walkway | Pause the queue, re-form the line with barriers, assign staff to redirect pass-through traffic, open overflow ordering point if available |
| Stair landing overcrowding | Stop guests from entering the stair approach, redirect to another route, station staff above and below the landing, monitor for falls or distress |
| Sudden push at doors when access opens | Delay release, create a controlled entry lane, add staff at the front, communicate wait times, admit guests in smaller groups |
Pre-write and rehearse PA scripts. In the middle of a surge, nobody wants to improvise over the speakers. Clear, consistent announcements help guests follow directions and cut pressure fast.
After the crowd clears, review the event while details are still fresh. Crowd safety plans get better with repetition, but that only happens when your team looks at what went wrong, what almost went wrong, and what worked - then turns that into clear changes before the next event. That loop is how live issues become better staffing, smarter layouts, and sharper briefings.
Run a same-day debrief, then follow it with a more structured review within 24–72 hours. Bring in operations, security, front-of-house, medical, and venue management. Use the same debrief checklist each time so every review covers the same core points. Then compare the plan with what actually happened.
Incident notes should include the time, location, impact, and staff response. That gives you something concrete to work with. When you map those notes against staffing positions, repeated trouble spots start to stand out. A pattern of near misses at the same watch point usually means something needs to change.
If your bar queue kept backing into an egress route between 7:30–9:00 p.m. and only one queue manager was assigned, that’s not just a rough night. It’s a staffing gap that needs to be fixed before the next event. Look for slow radio handoffs, watch points that got thin during peak periods, and layouts that created pinch points. Then update the crowd management plan, watch point assignments, and briefing scripts based on what you found.
Say this part clearly in every briefing: near-miss reporting is there to make the next event safer, not to blame people.
Once you decide on the fixes, store them with the event record. Notes spread across email threads, paper forms, and group chats make pattern-spotting much harder. Keeping incident reports, staffing plans, debrief summaries, layout diagrams, and communication logs in one place - tied to each event and venue - makes it far easier to pull up the right history when you're planning a similar event months later.
Quickstaff keeps staff assignments, event details, and communication history in one place, so lessons from one event don't get lost before the next one. If you're planning a recurring event at the same venue, you can duplicate a past setup and carry those lessons forward - adjusting watch point roles, changing staffing numbers in high-risk zones, and attaching briefing notes so the updates show up the next time you're back at that venue.
Use an incident run sheet approach. For each muster point, estimate capacity, confirm the location with venue management and the fire marshal, and set watch points for the busiest periods.
Safe crowd capacity depends on the area, available exits, and muster points. At the same time, responder access routes need to stay open. This should be checked with fire safety authorities and handled by location, not treated as one site-wide number.
Set this authority before the event starts. The Incident Commander has final decision-making authority during incident management, while the Safety Officer can stop any activity that appears unsafe.
The Show Director or Show Caller usually runs event flow. Put these roles, along with the escalation path, in your event plan so everyone knows who has the power to pause or stop operations.
A crowd surge plan should spell out named roles, reporting lines, escalation steps with clear response times, muster points for each zone, and radio terms chosen in advance.
It should also make clear who can stop operations in the affected area, who keeps egress routes open, who meets external responders, and who takes over if primary communication fails.