ClickUp Automations for Event Staff Booking
July 23, 2026

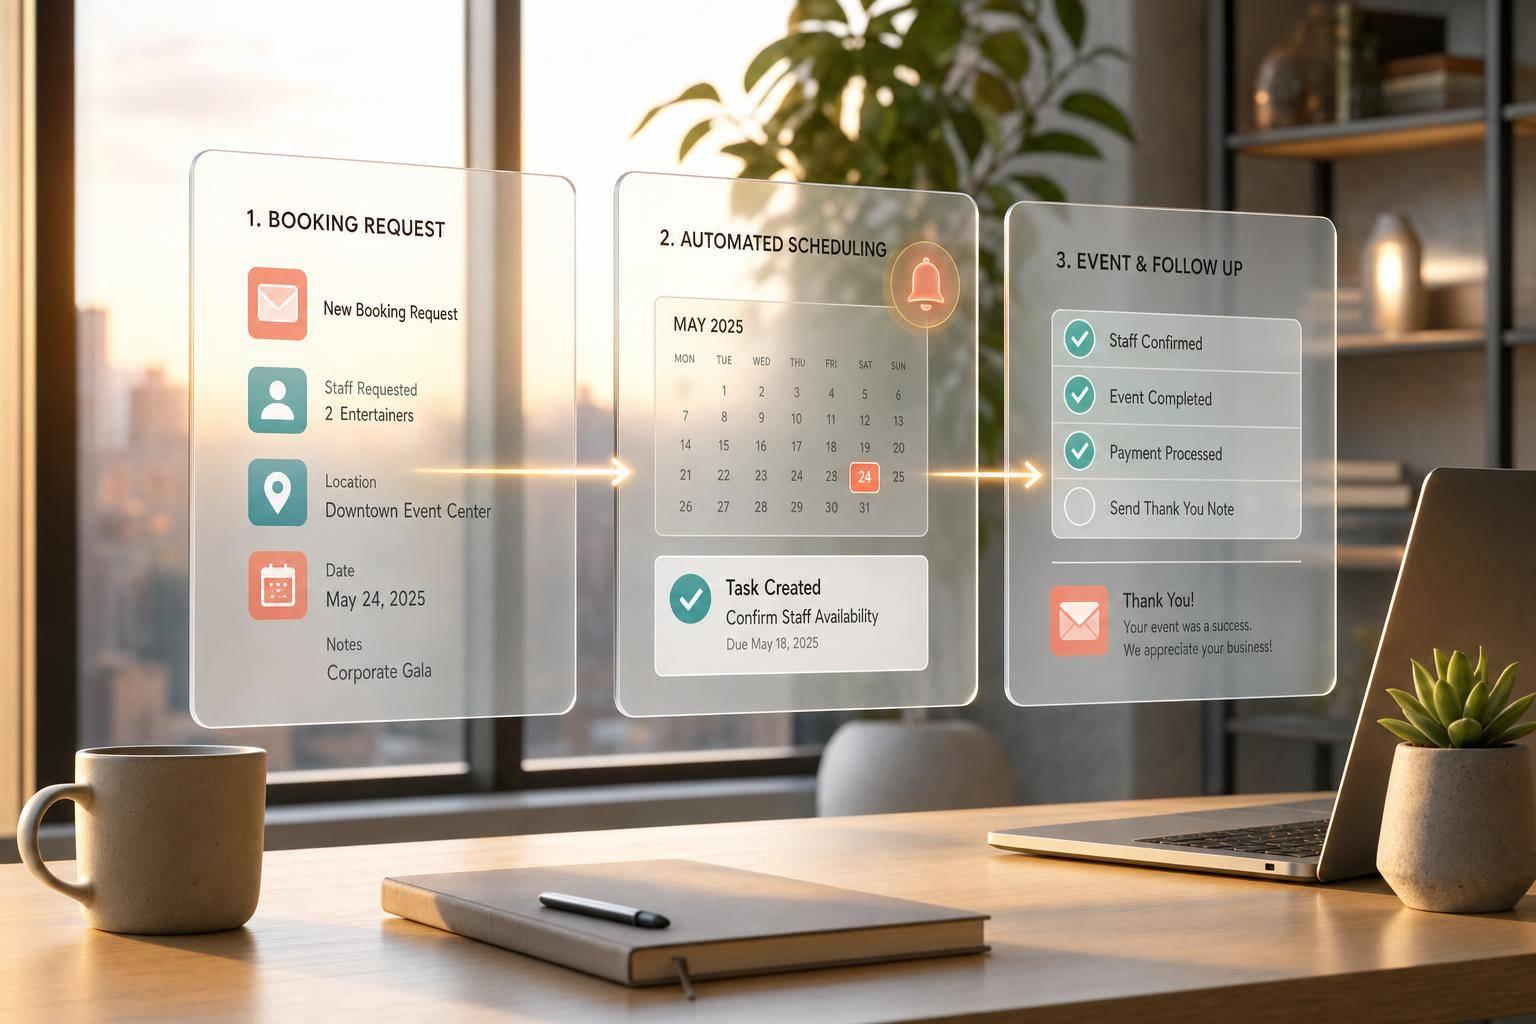
If your event bookings live in email, spreadsheets, and chat, things get missed. I’d set up ClickUp so each booking becomes one tracked task with clear statuses, due dates, owners, reminders, and follow-up steps.
Here’s the short version:
MM/DD/YYYYA setup like this helps cut manual follow-up, keeps due dates tied to the event date instead of the task creation date, and gives coordinators one place to check staffing progress, budgets in USD, venue info, and headcount.
The core idea is simple: build the workflow first, then let automations run the repeated steps.
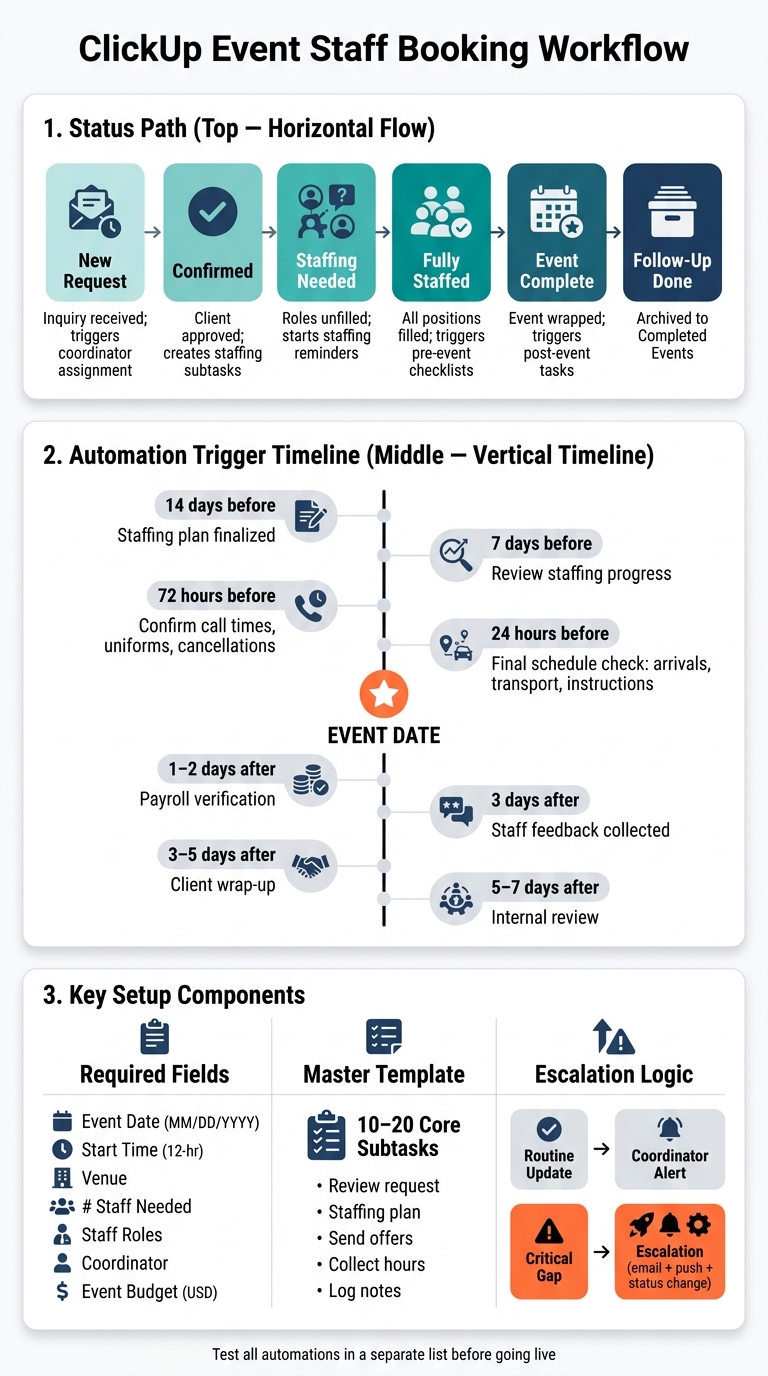
ClickUp Event Staff Booking Workflow: Status Path & Automation Triggers
After you’ve set your statuses and fields, the next step is to lock in a scalable event scheduling setup in ClickUp to hold each booking. Build this first. Your automations rely on it.
Create an Events Space with an Event Bookings Folder and two Lists:
Keeping these as separate Lists helps each automation fire at the right point in the process.
Statuses do the heavy lifting here. They act as automation triggers, so each booking should move through one clear path from the first request to the final follow-up.
| Status | What it means | Why it matters for automations |
|---|---|---|
| New Request | A new event inquiry has come in | Triggers coordinator assignment and sets the initial due date |
| Confirmed | Client has approved event details | Moves the task to Upcoming Events and creates staffing subtasks |
| Staffing Needed | Event is confirmed but roles aren't filled | Starts staffing reminders and filters into a staffing queue view |
| Fully Staffed | All required positions are filled | Pauses staffing reminders and triggers pre-event checklists |
| Event Complete | The event has wrapped up | Triggers post-event follow-up tasks and expense reconciliation |
| Follow-Up Done | All post-event tasks are finished | Moves the task to Completed Events and archives the record |
Use the exact status names shown above. Even a small typo can break an automation.
Custom Fields give your automations the data they need to work. For a U.S.-based event workflow, set up these fields:
MM/DD/YYYY like 07/24/2026. This is the anchor for every time-based reminder you’ll build.5:00 PM.$2,500.00, for reporting.Make Event Date required. If it’s missing, reminders won’t run.
These fields line up with the data Quickstaff already tracks, which means event details can sync over without manual re-entry.
With statuses and fields in place, turn the first booking into a task automatically.
New event requests can slip through the cracks fast when they live in email threads or scattered spreadsheets. A ClickUp Form fixes that by turning each booking request into a task in your intake List right away.
Pre-fill the task with the details your team needs most:
Then tag the task New Booking, assign it to the intake coordinator, and apply your template as soon as the task is created. That way, every booking starts the same way instead of relying on memory or manual setup.
A master template gives each new booking the same starting line. Keep it tight: 10–20 core subtasks is a good range.
Here’s a practical sequence:
Save it as a template task so your automations can apply it the moment a new booking comes in.
Once the intake task is in ClickUp, status-based automations can move the work to the right person without back-and-forth.
Start with two automations in the intake List.
The first runs when a task is created. It should apply the master event template and assign the task to the intake coordinator.
The second runs when status changes to Confirmed. It should reassign the task to the staffing coordinator and set subtask due dates based on the Event Date field.
| Subtask | Due date offset |
|---|---|
| Staffing plan finalized | 14 days before the event |
| Core staff confirmed | 7 days before the event |
| Final client check-in | 2–3 days before the event |
| Payroll export prepared | 1–2 days after the event |
You can also route bookings by type. For example, if Event Type = Wedding, assign Coordinator A. If Event Type = Corporate, assign Coordinator B. And if Number of Staff Needed > 20, add a senior coordinator as a watcher so there’s extra oversight.
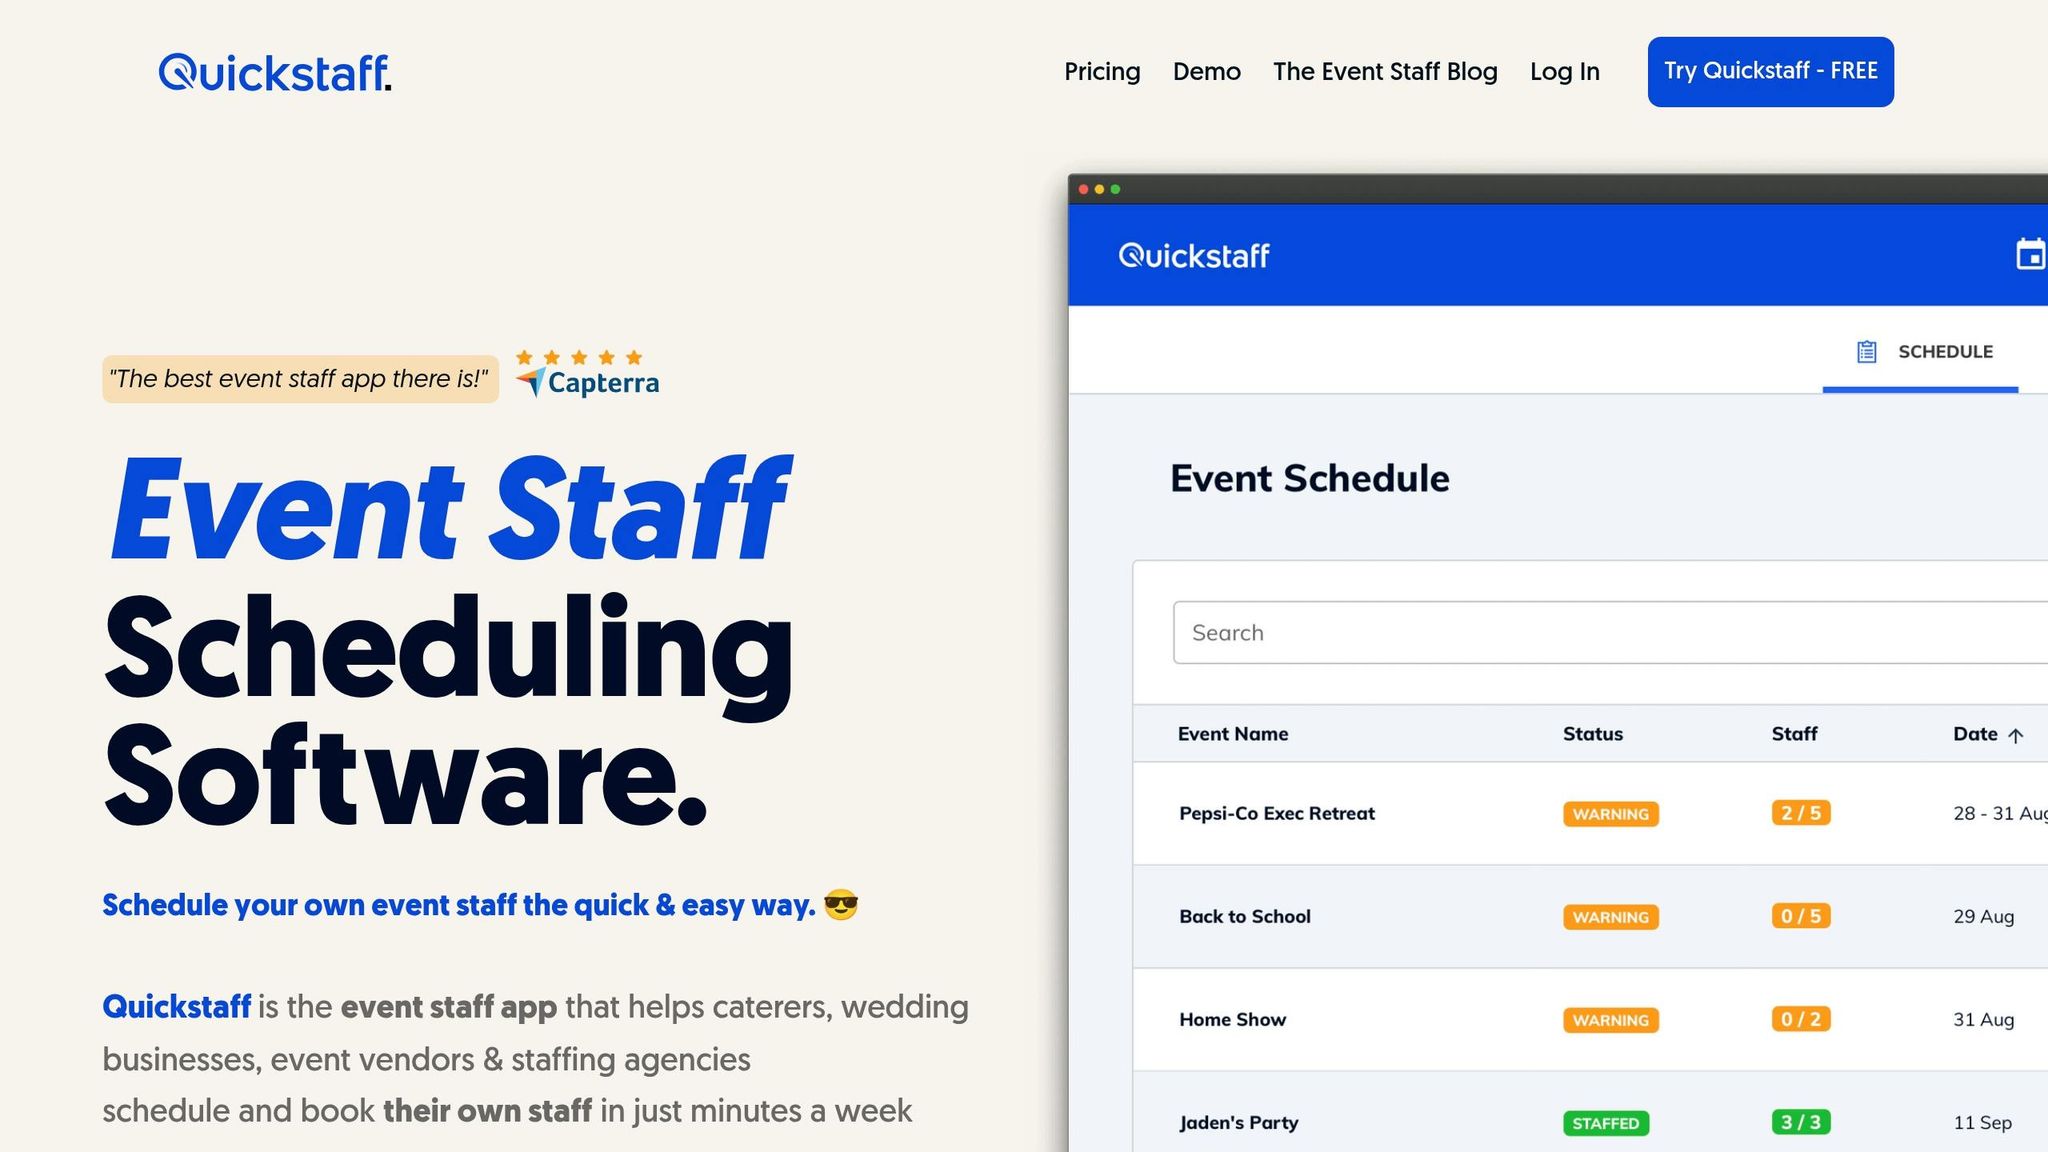
If your team uses Quickstaff, don’t sync everything just because you can. Pull over only the staffing updates that change coordinator decisions.
That usually means syncing:
Use a scheduled CSV update or a direct integration to push those staffing changes into the matching ClickUp task.
ClickUp automations can cut down on missed staffing deadlines. The idea is simple: trigger actions when a booking moves into staffing, when the event date gets close, or when a role is still unfilled.
When a booking status changes to Staffing Needed, have ClickUp create the staffing task right away, assign it to the event coordinator, and post the standard comment.
Set the rule like this: when status changes to "Staffing Needed" → create a staffing task from template, assign the event coordinator, and post a standard comment.
That comment should make open roles and headcount easy to scan: "6 servers needed, 2 confirmed; 2 bartenders needed, 0 confirmed; 1 captain needed, 1 confirmed." If your team uses Quickstaff, add a link or reference to the matching Quickstaff record so the coordinator can open it and check live availability and waitlist details.
This gives the coordinator the staffing gap at a glance. It also keeps staffing work connected to the original booking task.
After the staffing tasks are in place, use the event date to run reminder checks.
Set reminders for 7 days, 72 hours, and 24 hours before the event. Each one should do a different job:
Use the existing Event Date field to power all of these reminder rules.
A good rule of thumb: use event-date reminders for standard timelines, and use status-based alerts when something falls outside the normal flow.
When a reminder or update shows a staffing gap, send it to the right coordinator right away.
Not every change needs the same level of urgency. For routine updates, an in-app ClickUp notification to the primary coordinator is enough. If you get multiple cancellations a few days before the event, notify both the primary and backup coordinator, and add the staffing specialist as a watcher.
For gaps in key roles, step it up fast. Send an email, trigger a push notification, and change the status to Staffing Needed with a comment that names the exact role and count. If cancellations happen in Quickstaff, use that update to trigger the matching ClickUp status change.
Keep the setup simple: routine update → coordinator alert; critical gap → escalation.
Once staffing is locked in, move the booking into post-event mode.
When the event wraps, let automation handle payroll, feedback, client wrap-up, and the internal review. That way, nothing slips through the cracks and no one has to chase the same next steps by hand.
Set up one rule: when the task status changes to "Event Complete" → create post-event subtasks from a template. Each subtask should have a clear owner and a due date based on the event date, not the date the task was created.
For U.S.-based event teams, a solid timeline looks like this:
If your team uses Quickstaff to track hours and attendance, link the finalized Quickstaff record in the payroll subtask. That gives the billing coordinator the actual hours right away, without retyping anything.
Use one post-event template with role-based subtasks.
Before you turn these rules on for live events, test them in a separate list.
Create a dedicated "Automation Test" list in ClickUp, apart from your live events. Then build a sample task called "Sample Event – Automation Test" and fill in every field your automations rely on: event date, coordinator, staff count, and event type.
Run that sample task through the full status path used in your workflow. At each step, check that the right tasks appear, the right people are assigned, and the due dates land where they should. This is where small setup issues tend to show up.
Watch for a few common problems:
Keep testing until you get the same result every time.
After the test run is stable, move the workflow into live bookings.
Use one repeatable workflow for every completed event.
Review your settings for overlapping profiles. In Quickstaff, duplicate emails or notifications can happen when Global and Location profiles overlap. Check your admin or collaboration settings and remove any extra profiles that don't need to be there.
To avoid scheduling conflicts or double-booked staff, use calendar sync. Staff should also block off dates when they aren't available in the platform.
Require fields that capture the main event staffing details in a consistent way:
This keeps intake structured and makes it easier to spot qualified team members for each shift.
Use your go-to automation tool to connect Quickstaff and ClickUp with webhooks or API triggers.
When an event is created or updated, a shift gets confirmed, or someone’s availability changes in Quickstaff, that action can kick off a workflow. From there, you can send key details into ClickUp tasks, like event names, call times, locations, role assignments, and manager notes, so booking info stays in sync without manual entry.